Introduction :
Kitchen leakage is a common problem in Indian homes, particularly around the kitchen Ota (platform), sink, and dado tiles. What may begin as a small gap or deteriorated sealant can gradually allow water to seep into the cabinets, damage the wall below the platform, cause paint to peel, and create persistent dampness.
In many cases, the problem does not originate from the water supply pipes. Instead, water enters through gaps in the joints around the kitchen sink or along the junction between the countertop and the dado tiles.
The good news is that timely inspection and correct joint sealing can often prevent minor leakage from becoming a costly repair.
In this guide, we explain the common causes of kitchen Ota leakage, how to identify the source, and how to prevent the problem from recurring.
1. What Is Kitchen Ota Leakage?
Kitchen Ota leakage refers to water seeping through joints, gaps, or damaged connections around the kitchen countertop, sink, and wall finishes.
The Ota may be made of granite, quartz, or another countertop material, while the dado is the tiled or finished wall surface above the counter.
Because these surfaces meet at several joints, small gaps can become entry points for water, especially when the kitchen is used frequently for washing utensils, cleaning vegetables, and wiping the countertop.
Leakage may become visible as:
- Dampness inside the cabinet below the sink.
- Swelling or damage to modular kitchen shutters and carcasses.
- Water stains on the wall adjoining the kitchen.
- Peeling paint or bubbling plaster on the opposite side of the wall.
- Persistent moisture, unpleasant odour, or mould-like growth beneath the platform.
Identifying the actual entry point is essential before applying any sealant or starting repairs.
2. Common Causes of Kitchen Ota Leakage
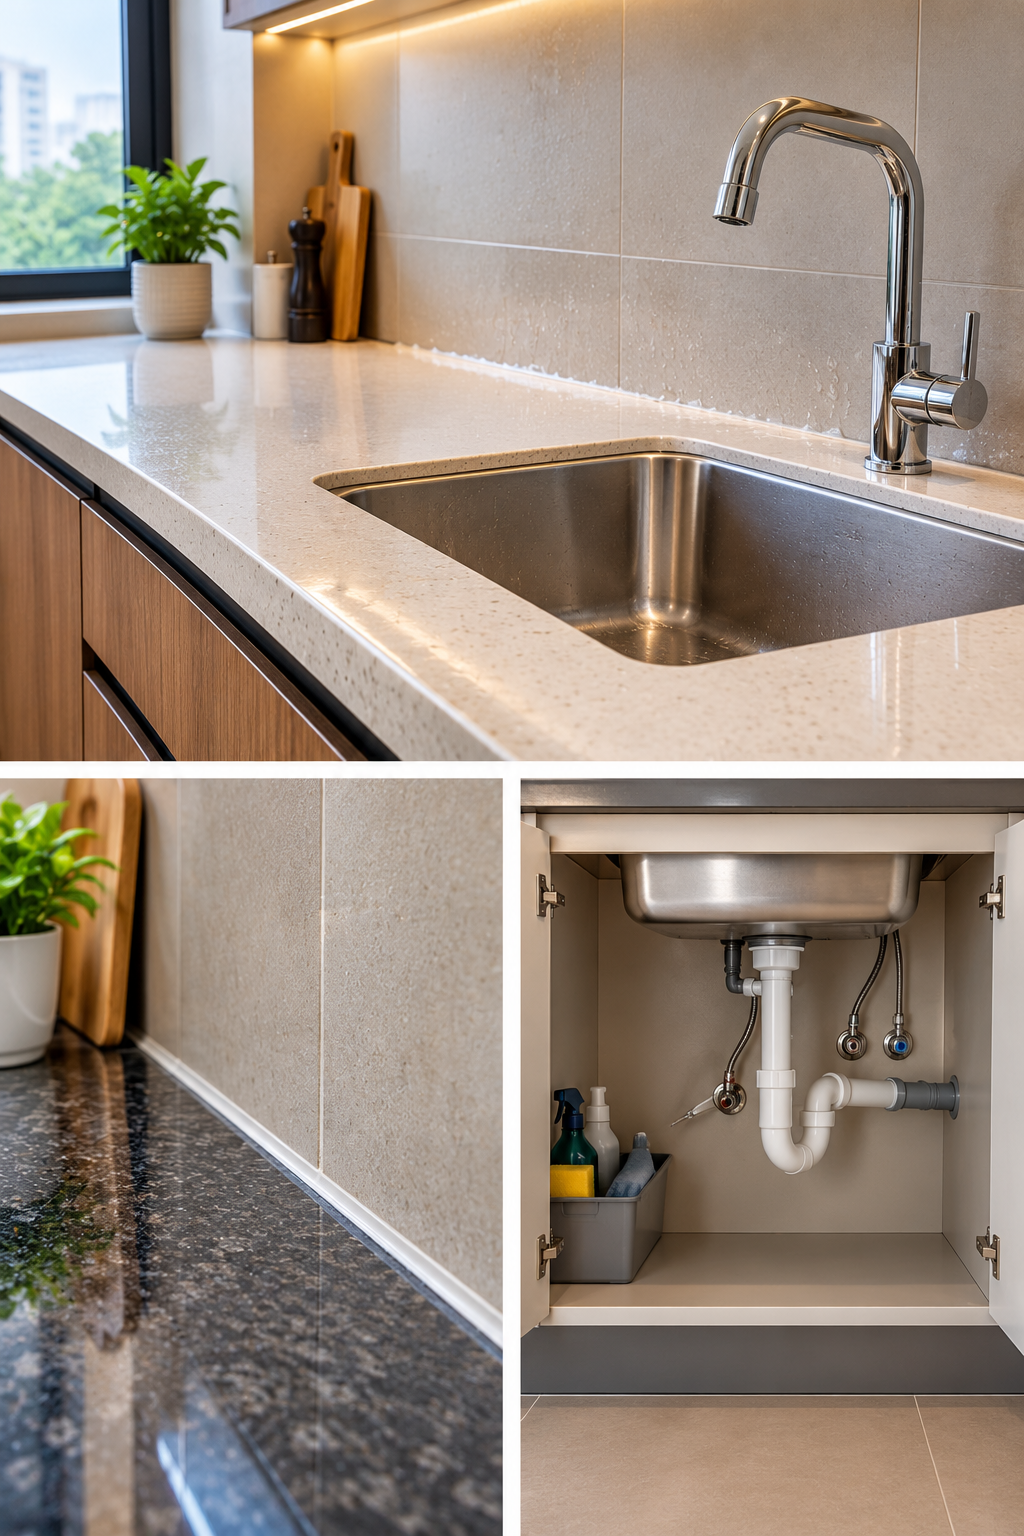
A. Leakage at the Sink-to-Granite or Quartz Joint
This is one of the first areas that should be inspected when investigating kitchen platform leakage.
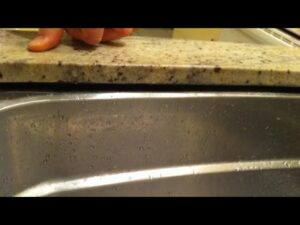
The kitchen sink is fitted into or beneath the countertop, and the junction between the sink rim and the granite or quartz must be sealed appropriately. Depending on the sink design, water can enter through a deteriorated, incomplete, or poorly applied seal.
Common reasons include:
- The original sealant has become brittle, cracked, or detached.
- The joint was not sealed continuously during installation.
- Repeated water exposure and cleaning have weakened the seal.
- The sink has shifted slightly or the joint has developed a gap.
- Incorrect materials or inadequate surface preparation were used during sealing.
When water repeatedly passes through this joint, it can collect inside the cabinet or seep into the surrounding construction.
Important: Water around the sink can also come from a leaking waste outlet, drain connection, tap connection, or supply pipe. These should be checked before assuming that the countertop joint is responsible.
B. Leakage at the Ota and Dado Joint
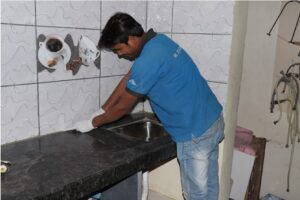
The horizontal kitchen countertop meets the vertical dado tiles or wall finish along a joint that is exposed to regular splashing and cleaning.
Over time, the seal at this junction may crack, separate, or deteriorate. Water can then enter the gap and reach the wall, countertop support, or cabinet area below.
Possible causes include:
- Missing or poorly finished joint sealant.
- Cracked or deteriorated grout.
- Movement between the countertop and the wall.
- Gaps left during installation.
- Repeated water exposure without timely maintenance.
The correct repair depends on the joint condition and the materials involved. A movement-prone junction may require a compatible flexible sealant rather than simply filling the gap with rigid grout.
C. Leakage from Sink Plumbing and Drain Connections
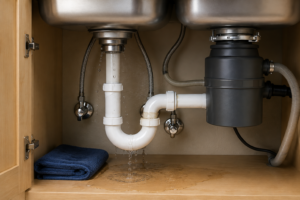
Not every kitchen leakage problem originates at a visible countertop joint.
Water may escape from the sink waste outlet, bottle trap, drainpipe connection, flexible supply hose, or tap fitting. Such leaks may occur only when water is running or when the sink is full.
A basic inspection should check the plumbing connections as well as the visible seals around the sink.
D. Cracks or Gaps in the Countertop Installation
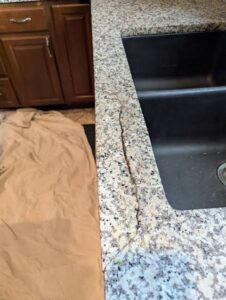
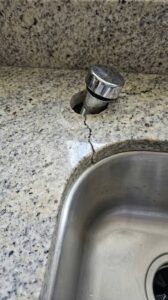
Cracks in the stone, poorly sealed cut-outs, or gaps around fittings can also permit water to enter areas that should remain dry.
Granite and quartz countertops are generally durable, but the joints and installation details still need proper execution and maintenance.
3. How to Identify the Source of Kitchen Leakage
Before repairing the problem, determine where the water is entering.
Follow these practical checks:
Step 1: Inspect the cabinet below the sink.
Look for damp patches, water marks, swollen boards, or moisture around the drain connections.
Step 2: Check the sink perimeter.
Examine the full joint between the sink and the countertop. Look for visible gaps, peeling sealant, or sections that have detached.
Step 3: Inspect the Ota–dado junction.
Check whether the seal is continuous and whether there are cracks, missing grout, or open gaps along the wall-countertop junction.
Step 4: Test the plumbing connections.
Run water and observe the supply connections, waste outlet, and drainpipe. If leakage appears only when the sink is used, plumbing may be involved.
Step 5: Observe the affected wall or cabinet.
Note where moisture first appears and whether it increases after washing utensils or cleaning the countertop.
If the source is not obvious, a plumber or waterproofing professional can conduct a more systematic inspection. Avoid flooding the counter or deliberately pouring excessive water into suspected gaps, as this can worsen existing damage.
4. How to Fix Kitchen Ota Leakage
The repair should address the actual source of water entry instead of merely covering the visible damp patch.
A. Resealing the Sink-to-Countertop Joint
If the sink perimeter seal has failed, the usual repair involves removing the deteriorated sealant and preparing the joint for resealing.
A proper process generally includes:
- Remove the old, loose, or failed sealant carefully.
- Clean the joint and remove grease, soap residue, dust, and other contaminants.
- Allow the joint to dry as required by the sealant manufacturer’s instructions.
- Check that the sink is properly supported and has not shifted.
- Apply a compatible, kitchen- and water-suitable sealant continuously around the required joint.
- Tool the seal neatly and allow the recommended curing time before exposing it to water.
A suitable sanitary-grade silicone sealant is commonly used for many sink-to-countertop joints, provided it is compatible with the sink and stone materials.
For natural stone, use a product specifically approved for the material, as some sealants may stain certain stones. The appropriate product also depends on whether the sink is top-mounted, flush-mounted, or under-mounted.
Do not simply apply a new bead over old, detached silicone. The underlying joint must be properly prepared for a durable repair.
B. Sealing the Ota–Dado Joint
If water is entering through the junction between the countertop and the dado, first remove loose material and assess the joint.
Depending on the joint design and condition, repairs may involve:
- Replacing failed sealant with a compatible flexible sealant.
- Repairing damaged grout where grout is appropriate.
- Correcting an installation gap or movement-related defect.
- Addressing moisture-damaged plaster or finishes after the water entry has been stopped.
The joint should be continuous, neat, and suited to the materials on both sides.
Rigid grout alone may not be suitable where the countertop and wall can move slightly relative to each other. Using the wrong material can lead to cracking and recurring leakage.
C. Repairing Plumbing-Related Leakage
If the problem comes from the sink outlet, trap, supply hose, or drain connection, the defective fitting or connection must be repaired or replaced.
Sealing the visible sink edge will not solve a leaking pipe connection.
Where water has damaged the cabinet, the affected area should be dried and assessed. Swollen particleboard, delaminated finishes, or persistent moisture may require component replacement after the leak has been corrected.
D. When More Extensive Waterproofing Is Required
If moisture continues after the visible joints and plumbing have been repaired, further investigation is necessary.
The source could be a concealed pipe leak, a crack in the surrounding construction, or another water-entry route. In such cases, repeated surface sealing is unlikely to solve the underlying problem.
The repair method should be selected only after the source is established.
5. How Often Should Kitchen Ota Joints Be Inspected?
Kitchen joints are exposed to water almost every day, so periodic inspection is important.
As a practical maintenance routine:
- Every month: Look for visible gaps, detached sealant, standing water, and dampness inside the sink cabinet.
- Every six months: Thoroughly inspect the sink perimeter and the Ota–dado junction.
- Whenever a problem appears: Repair cracked or detached sealant promptly instead of waiting for visible wall damage.
These are suggested inspection intervals, not a guarantee against leakage. The frequency of maintenance depends on kitchen usage, installation quality, materials, and the condition of the joints.
Do not replace intact sealant unnecessarily. Repair or renew it when inspection shows deterioration or when the manufacturer’s maintenance instructions recommend it.
6. Common Mistakes to Avoid
Applying sealant over an existing failed joint
New sealant applied over dirty, wet, greasy, or detached material may not adhere properly.
Ignoring the sink drain and plumbing
Water appearing below the sink may originate from the waste outlet or a pipe connection rather than the countertop edge.
Using grout for every joint
Different joints require different materials. A movement-prone junction may need a flexible sealant rather than rigid grout.
Using an unsuitable sealant
A product that is not compatible with the stone, sink, or surrounding finish may fail or cause staining.
Waiting until the cabinet is damaged
Early signs such as a small gap, damp cabinet base, or detached sealant should be investigated before prolonged water exposure causes more extensive damage.
Sealing without identifying the cause
If a concealed pipe is leaking, sealing the sink perimeter will not address the source.
7. How to Prevent Kitchen Ota Leakage in the Long Term
A few simple habits can reduce the risk of water seepage:
- Ensure that sink and countertop joints are properly sealed during installation.
- Use a compatible sealant recommended for the sink and countertop materials.
- Check that the sink is adequately supported and does not move during use.
- Inspect the sink perimeter and Ota–dado junction periodically.
- Wipe away standing water, particularly around the sink and wall junction.
- Repair deteriorated sealant as soon as it is noticed.
- Check the waste outlet, trap, and plumbing connections whenever leakage appears.
- Investigate persistent dampness instead of repeatedly applying surface sealant.
For a new kitchen, careful detailing during installation is especially important. For an existing kitchen, maintenance and timely repairs can help avoid damage to cabinets, finishes, and adjoining walls.
8. When Should You Call a Professional?
Consider professional inspection when:
- Water continues to appear after the visible joints have been resealed.
- The cabinet below the sink remains damp or has started swelling.
- The wall adjoining the kitchen shows recurring damp patches or peeling paint.
- The source of leakage is unclear.
- There is suspected concealed plumbing leakage.
- The countertop or sink has shifted, cracked, or developed a significant gap.
A plumber can investigate supply and drainage connections, while a waterproofing or renovation professional can assess the countertop joints, surrounding construction, and any resulting damage.
Correct diagnosis can help avoid unnecessary dismantling or repeated repairs that fail to address the actual problem.
Final Thoughts
Kitchen Ota leakage may appear to be a minor maintenance issue, but a small gap around the sink or along the Ota–dado junction can allow repeated water entry and gradually damage the surrounding finishes and cabinets.
The key is to identify the actual source, prepare and seal the joint correctly, inspect the plumbing, and monitor the affected area after repairs.
For homeowners, checking the sink-to-countertop seal and the Ota–dado joint every six months is a simple preventive habit that can help catch deterioration early. If leakage persists despite proper sealing, investigate the underlying cause rather than repeatedly covering the same area.
At Design Within, careful detailing, suitable material selection, and proper execution are important parts of creating kitchens that remain functional, durable, and easier to maintain.
At Design Within, we believe a beautiful interior should not only look good when it is completed — it should also perform well for years.
Before we dive into more details about designing your furniture, it might be helpful to estimate how much your interior design project could cost. Understanding your budget can help you make more informed decisions about what features to prioritize. To get a better idea, you can use our ‘interior design budget calculator’ budget calculator and start planning your dream home today.
Frequently Asked Questions
1. What is the most common cause of kitchen Ota leakage?
Common causes include failed sealing around the sink, gaps at the Ota–dado junction, and leakage from sink plumbing connections. The actual source should be identified before repairs begin.
2. How do I stop water leaking between the kitchen sink and granite?
If the seal has failed, the old material should be removed, the joint cleaned and dried appropriately, and a compatible sealant applied according to the manufacturer’s instructions. Plumbing connections and sink support should also be checked.
3. Can silicone sealant be used between the sink and granite?
A compatible sanitary-grade silicone is commonly suitable for many sink-to-countertop joints. However, the product must be appropriate for the sink and stone material. Some natural stones require sealants specifically formulated to avoid staining.
4. Why does water seep through the joint between the Ota and dado tiles?
The joint may have deteriorated, cracked, or been left inadequately sealed. Movement between the countertop and wall can also cause failure. The correct repair depends on the joint design and condition.
5. Will sealing the kitchen platform stop all leakage?
No. Sealing may resolve leakage through a failed joint, but it will not repair a leaking pipe, waste outlet, concealed connection, or another source of moisture.
6. How often should kitchen sink sealant be checked?
Inspect it visually every month and carry out a more thorough joint inspection about every six months. Repair it when deterioration is observed, following the product manufacturer’s guidance.
7. Can kitchen Ota leakage damage modular kitchen cabinets?
Yes. Repeated water exposure can cause swelling, delamination, damaged finishes, unpleasant odours, and deterioration of cabinet components. Promptly stopping the leak and drying the affected area helps limit damage.